Platefulkitchen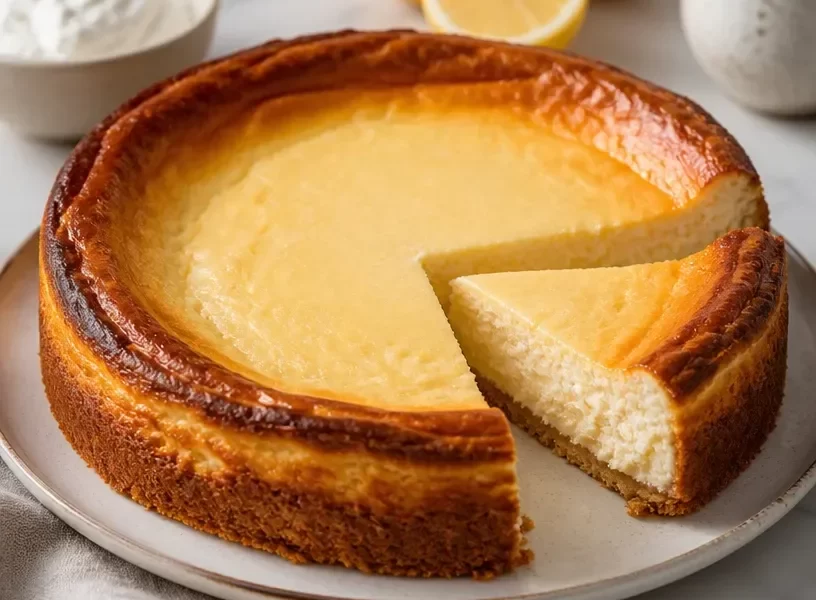
The Creamiest Protein-Packed New York Cheesecake: A Deliciously Guilt-Free Indulgence
Hello, fellow foodies! Today, we’re diving into the world of decadent dessert with a twist: a protein-packed New York cheesecake that keeps the indulgence without the guilt. Whether you’re cozying up on the couch after a long day or treating friends to a stunning finish at a dinner party, this cheesecake is sure to impress. So, grab your apron and let’s whip up something amazing!
A Slice of Nostalgia
Cheesecake has always held a special place in my heart. I’ll never forget the first time I tried a traditional New York cheesecake. It was at a bustling little bakery in the city, and I can still picture the glimmer of the glass display case. As I took my first bite, that exquisite creaminess danced on my tastebuds, mingling with a hint of tanginess. I was hooked! But upon glancing at the calorie count, I felt a twinge of guilt washing over me.
From that day, I vowed to find a way to enjoy cheesecake that didn’t send me directly to the gym for penance. Fast forward a few years, and I’ve developed this protein-packed version that’s both satisfying and flavorful! It combines creamy goodness with wholesome ingredients that let you indulge without any regrets. Let’s create a masterpiece that will have everyone asking for seconds!
Ingredients
Here’s what you’ll need to bring this luscious cheesecake to life:
-
Greek Yogurt or Cottage Cheese: These are the stars of our cheesiness! Creamy, thick, and rich in protein, they provide a solid base for texture. Looking for a lower-calorie option? Skim cottage cheese works wonders here!
-
Protein Powder: This is where we pack in the protein! Use your favorite flavor—vanilla or unflavored work beautifully. If you’re vegan, there are plant-based protein powders available.
-
Light Flour Alternative: Choose almond flour, coconut flour, or oat flour for a healthier crust. They add fiber and keep our cheesecake gluten-free!
-
Reduced-Fat Dairy: Using light cream cheese helps maintain that classic creamy texture while cutting down on calories. Feel free to opt for a vegan cream cheese if you’re avoiding dairy entirely.
-
Flavor-Specific Ingredients: Add a splash of vanilla extract, a tablespoon of lemon juice for brightness, or cocoa powder for a chocolate twist. You can customize this cheesecake to suit your cravings!
Step-by-Step Instructions
Now, let’s get our hands dirty and make this cheesecake dream a reality!
-
Preheat Your Oven: Start by preheating your oven to 325°F (163°C). This ensures an even bake, so your cheesecake comes out smooth and creamy. Trust me, no one likes a cracked dessert!
-
Prepare the Crust: In a mixing bowl, combine 1 cup of your chosen light flour alternative with 2 tablespoons of melted coconut oil or butter and 2 tablespoons of a natural sweetener like honey or agave. Mix until it resembles wet sand. Press this mixture firmly into the bottom of a greased 9-inch springform pan. This is your foundation for that delightful crunch!
-
Blend the Filling: In a large bowl, combine 2 cups of Greek yogurt or cottage cheese and 1 package (8 oz) of reduced-fat cream cheese, both at room temperature. Using a mixer or blender, beat the ingredients until smooth and creamy. This is where the magic happens—so be patient and don’t rush!
-
Add the Protein: Sprinkle in 1 scoop of protein powder, 2 tablespoons of your chosen flavor-specific ingredient (vanilla extract works wonders), and 1 tablespoon of lemon juice. Blend until everything is well-incorporated. Taste the mixture! You should be rewarded with a delicious blend of flavors.
-
Pour and Smooth: Carefully pour the creamy filling over the crust in your springform pan. Use a spatula to smooth out the top, ensuring it’s even. This step is crucial for an adorable presentation!
-
Bake to Perfection: Pop the cheesecake in your preheated oven for about 40-45 minutes. You want the edges to be set while the center still has a slight jiggle. It’ll continue to firm up as it cools.
-
Cool Down: Once baked, turn off the oven and crack it open slightly. Let the cheesecake cool in the warm oven for an hour—this helps prevent cracks. You’ll want to be patient at this stage!
-
Chill Time: After the hour, transfer your cheesecake to the fridge, and let it chill for at least 4 hours, preferably overnight. This ensures the flavors meld beautifully and just the right texture is achieved.
Serving Suggestions
When it’s finally time to serve your masterpiece, remove the cheesecake from the springform pan and place it on a lovely serving platter. You can garnish it with fresh fruit, a drizzle of melted dark chocolate, or a sprinkle of nuts for added texture. Serve cold, and watch your guests’ eyes light up!
Recipe Variations
- Chocolate Marble: Swirl in some melted dark chocolate for a decadent touch!
- Berry Bliss: Add a layer of fresh berries on top or fold them into the batter for fruity goodness.
- Nutty Goodness: Mix in crushed nuts into the crust or as a topping for extra crunch.
- Key Lime Cheesecake: Swap in lime juice and zest for a refreshing citrus twist.
- Pumpkin Spice: In the fall, add pumpkin puree and spices like cinnamon and nutmeg for a seasonal favorite!
Chef’s Notes
This cheesecake isn’t just a recipe; it’s a labor of love that has evolved over years of kitchen experimentation. I remember the first time I tried to make a cheesecake without heavy cream and sugar. It was a disaster! But those missteps taught me a lot about texture and flavor balance. Now, I enjoy creating healthier versions of classic desserts, and with this recipe, I think I’ve finally nailed it!
FAQs and Troubleshooting
-
Why is my cheesecake cracked?
- Cracking usually happens due to uneven baking or a sudden temperature change. Let it cool gradually in the oven and avoid overbaking to help prevent this.
-
How do I know when the cheesecake is done?
- The edges should be set, and the center should jiggle slightly when you gently shake it. It will firm up as it cools.
-
Can I freeze the cheesecake?
- Absolutely! Wrap it tightly in plastic wrap and foil before freezing. Just be sure to allow it to thaw in the fridge before serving.
-
Is this recipe suitable for meal prep?
- Yes! This cheesecake keeps well in the fridge for up to a week, making it a perfect treat to enjoy throughout your busy week.
Nutritional Info
A standard slice of this protein-packed New York cheesecake contains approximately:
- Calories: 180
- Protein: 15g
- Fat: 7g
- Carbohydrates: 20g
It’s a delicious way to satisfy your sweet tooth while still fueling your body with protein!
So there you have it! This protein-packed New York cheesecake is not just a dessert but a celebration of flavors and memories. I hope you find as much joy in making (and sharing!) this cheesecake as I do. Remember, cooking is about connecting, enjoying, and most importantly—having fun in the kitchen! 🧡 Let’s fill our plates!
PrintThe Creamiest Protein-Packed New York Cheesecake
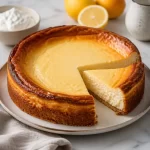
A decadent protein-packed New York cheesecake that offers indulgence without guilt.
- Prep Time: 20 minutes
- Cook Time: 45 minutes
- Total Time: 265 minutes
- Yield: 8 servings 1x
- Category: Dessert
- Method: Baking
- Cuisine: American
- Diet: Protein-packed, Gluten-free
Ingredients
- 1 cup light flour alternative (almond, coconut, or oat flour)
- 2 tablespoons melted coconut oil or butter
- 2 tablespoons natural sweetener (honey or agave)
- 2 cups Greek yogurt or cottage cheese
- 8 oz reduced-fat cream cheese
- 1 scoop protein powder (vanilla or unflavored)
- 2 tablespoons flavor-specific ingredient (vanilla extract, lemon juice, or cocoa powder)
Instructions
- Preheat your oven to 325°F (163°C).
- Prepare the crust by combining the flour, melted oil or butter, and sweetener; press into a greased 9-inch springform pan.
- Blend the Greek yogurt or cottage cheese with cream cheese until smooth.
- Add the protein powder and flavor ingredients, blending until incorporated.
- Pour the filling over the crust and smooth the top.
- Bake for 40-45 minutes until the edges are set and the center jiggles slightly.
- Cool in the oven for an hour, then refrigerate for at least 4 hours or overnight.
Notes
Garnish with fresh fruit, dark chocolate drizzle, or nuts for added texture.
Nutrition
- Serving Size: 1 slice
- Calories: 180
- Sugar: 8g
- Sodium: 200mg
- Fat: 7g
- Saturated Fat: 4g
- Unsaturated Fat: 2g
- Trans Fat: 0g
- Carbohydrates: 20g
- Fiber: 3g
- Protein: 15g
- Cholesterol: 20mg
Keywords: cheesecake, protein dessert, guilt-free cheesecake, healthy dessert recipe