Platefulkitchen
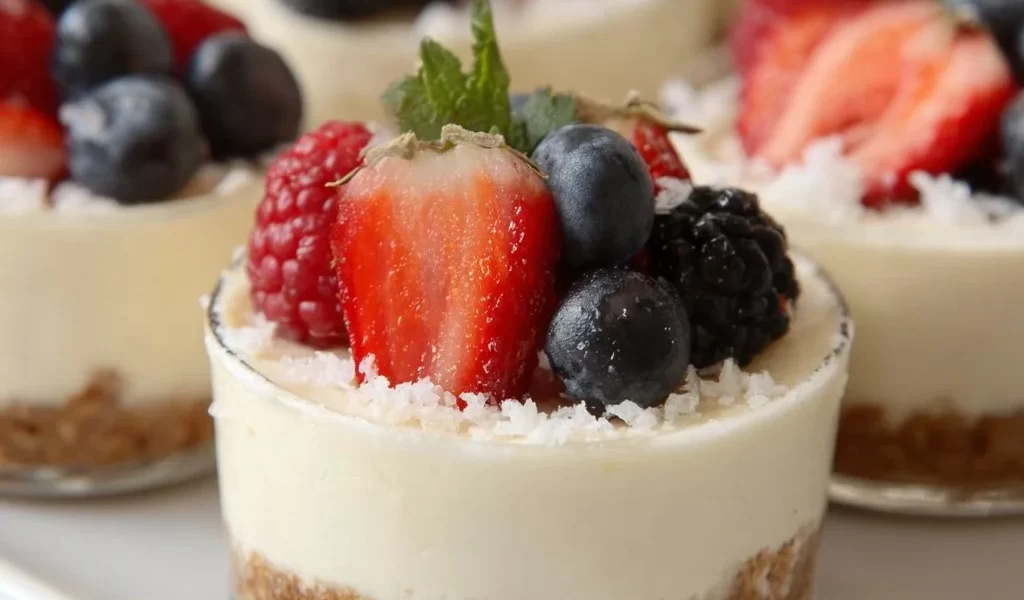
Indulge in Delightful No-Bake Cheesecake Cups: A Simple Recipe to Satisfy Your Sweet Tooth
Hello, fellow food enthusiasts! Today, we’re diving into one of my absolute favorite desserts: No-Bake Cheesecake Cups. If you’ve ever had one of those days where you crave something sweet but don’t want to heat up the oven, this recipe is for you. These cheesecake cups are creamy, dreamy, and downright delightful, and the best part? They’re incredibly easy to make!
Imagine this: it’s a warm summer evening, and you’ve invited some friends over. You’re all relaxed on the patio, sharing stories and laughter. And what’s the grand finale to this cheerful gathering? These no-bake cheesecake cups, of course! They’re light, refreshing, and topped with juicy fresh berries, making them the perfect end to any meal—or the perfect snack all on their own.
I love sharing recipes that bring people together, and this no-bake cheesecake is one of those dishes that feels like a big hug in a cup. You get to scoop out the creamy filling, savor the crunch of the graham cracker crust, and enjoy the bright bursts of flavor from the berries. It’s not just about satisfying a sweet tooth; it’s about the joy of cooking and sharing something delightful with the people you love. So, let’s roll up our sleeves and get started on these scrumptious cheesecake cups!
Personal Story
I’ll let you in on a little secret: my love affair with cheesecake began when I was a kid. Every summer, I’d visit my grandmother, and she’d whip up her famous cheesecake for our family gatherings. I still can picture her bustling around the kitchen, her warm smile reflecting her joy of cooking for the ones she loved.
One evening, while we were waiting for dinner to finish cooking, I snuck a finger full of her cheesecake batter from the mixing bowl. Oh, that creamy sweetness bursting with flavor! I knew then that cheesecake would always hold a special place in my heart.
Fast forward to now, and while I’ve experimented with countless variations, I always find myself returning to that nostalgic memory. These no-bake cheesecake cups are my modern take on that beloved dessert, allowing everyone to enjoy a taste of happiness — whether at a summer barbeque or a cozy night in. Trust me, once you try these, you too will have a go-to dessert that you’ll want to share with family and friends.
Ingredients
-
1 Sleeve Graham Crackers
- This is the base for your crust, giving that perfect crunchy texture. If you’re feeling adventurous, you could swap in digestive biscuits or chocolate wafer cookies for a different flavor profile.
-
1/4 Cup Sugar
- Sweetens the crumb crust. You could use brown sugar for a deeper flavor or even a sugar substitute like stevia if you’re watching your sugar intake.
-
5 Tablespoons Butter, Melted
- The glue that holds the crust together! Unsalted butter works best, but you could use coconut oil for a dairy-free version.
-
2 Packages (8 oz each) Cream Cheese, Softened
- The star of the show, contributing to that rich and creamy texture. Be sure it’s softened to avoid lumps—trust me, nobody wants a lumpy cheesecake!
-
2 Cups Powdered Sugar
- Adds sweetness and helps achieve that smooth consistency. If you’re looking to lighten things up, you can reduce the amount or use a sugar alternative designed for baking.
-
2 Cups Heavy Whipping Cream
- This is what makes your cheesecake light and fluffy! If you want a lower-fat version, you could try a cream cheese alternative or use whipped topping instead.
-
2 Teaspoons Vanilla Extract
- This little addition brings depth to the flavor. Consider using pure vanilla extract for the best taste — it really makes a difference!
-
Fresh Berries of Your Choice
- These add a pop of color and freshness! Strawberries, blueberries, and raspberries all work wonderfully. If fresh isn’t available, frozen berries could be used too, just thaw and drain excess moisture.
Step-by-Step Instructions
Let’s get started on crafting these delightful cheesecake cups! Gather your ingredients and let’s dive in.
Step 1: Make the Crust
Start by placing the graham crackers in a food processor and pulse them until they turn into fine crumbs. If you don’t have a food processor, you can also place them in a zip-top bag and crush them with a rolling pin. A little frustration relief, if you ask me!
In a mixing bowl, combine the crushed graham crackers, sugar, and melted butter. Stir until all the crumbs are well-coated and something resembling damp sand forms.
Tip: If you want a little extra flavor, consider toasting the crumbs in the oven at 350°F (175°C) for about 5 minutes for a nuttier taste. Just keep a close eye on them so they don’t burn!
Step 2: Prepare Individual Serving Cups
Now, it’s time to assemble! Grab your serving cups or jars (small mason jars work great) and spoon about 2 tablespoons of the graham cracker mixture into each cup. Press it down firmly with your fingers or the back of a spoon to make a nice base.
Step 3: Create the Cheesecake Filling
In a large bowl, beat the softened cream cheese with a hand mixer on medium speed until it’s creamy and smooth. Next, add in the powdered sugar and vanilla extract, mixing until fully combined — you want it silky smooth!
Now comes the fun part! In a separate bowl, whip the heavy cream until soft peaks form. Then gently fold this whipped cream into your cream cheese mixture. Use a spatula and fold gradually to keep the volume; we want it light and airy!
Little Chef Hack: If your cream cheese isn’t soft enough, you can microwave it for about 15 seconds to help it along. Just make sure not to overheat it.
Step 4: Assemble the Cheesecake Cups
Once your cheesecake filling is ready, carefully spoon it over the graham cracker crust in each cup. You can pipe it in with a piping bag for a fancier touch or simply pack it using a spoon. Top them off with a dollop of leftover filling if you’d like!
Step 5: Chill and Serve
Cover the cups with plastic wrap and pop them in the fridge for at least 4 hours, or ideally overnight. This gives the flavors time to mingle and the cheesecake to set perfectly.
When you’re ready to serve, remove the cups from the fridge and top them with your favorite fresh berries. They will bring a burst of color and freshness that complements the rich cheesecake beautifully.
Serving Suggestions
To serve these beautiful no-bake cheesecake cups, simply arrange them on a platter, garnish with a sprig of mint, or drizzle with chocolate or caramel sauce for an extra touch of indulgence. They’re perfect for any occasion, from casual weeknight treats to fancy dinner parties!
Recipe Variations
Feeling adventurous? Here are some fun variations to try:
- Chocolate Lovers: Add melted chocolate into your cream cheese mixture for a rich, chocolatey cheesecake. You can use cocoa powder or melted chocolate.
- Fruit Swirl: Fold in fruit purees like strawberry or raspberry into the cheesecake filling before layering it in the cups.
- Nutty Delight: Mix in chopped nuts like pecans or walnuts into the crumbs or sprinkle them on top before serving for a delightful crunch.
- Zesty Lemon: Add lemon zest and a bit of lemon juice for a zesty twist on the classic flavor. It’s refreshing and perfect for warmer days!
- Dairy-Free Version: Substitute the cream cheese with a dairy-free alternative, like cashew cream or coconut cream, and use coconut whipped cream for the topping.
Chef’s Notes
These no-bake cheesecake cups have grown up with me over the years! What started as a simple recipe has evolved into a versatile dessert that I love to experiment with. Sometimes, I’ll even let my kids help in the kitchen, creating their own unique flavors by mixing in their favorite candies or toppings.
Funny story: during one of our family gatherings, my younger brother tried to sneak a few cups away before dinner and ended up spilling half of them on the way. Let’s say we had quite the laugh cleaning up the mess while making impromptu cheesecake parfaits! Those moments are what cooking is all about: laughter, messiness, and lots of love.
FAQs and Troubleshooting
Q: What if my cheesecake filling is too runny?
A: If your filling is too runny, it might be that your cream wasn’t whipped enough. Make sure to whip your cream until soft peaks form. Additionally, remember that chilling in the fridge will help it set.
Q: Can I make these ahead of time?
A: Absolutely! These cheesecake cups can be made up to two days in advance, making them perfect for parties or special occasions. Just keep them covered in the refrigerator until serving.
Q: How can I store leftovers?
A: Store any leftovers in an airtight container in the refrigerator for up to 3 days. Though, let’s be honest, I doubt there will be any leftovers!
Q: My cheesecake cups have lumps! What went wrong?
A: Lumps in your filling usually mean that the cream cheese wasn’t softened enough. Make sure it’s at room temperature before you start mixing, and beat it well to incorporate air and ensure a smooth texture.
Nutritional Info
While I’m not one to fixate on calories—after all, food is meant to be enjoyed—here’s a rough estimate per cup for you health-conscious folks out there:
- Calories: Approximately 300 calories
- Sugar: 25g
- Fat: 22g
Keep in mind that price may vary depending on substitutions and additional toppings.
And there you have it — a richly satisfying recipe for No-Bake Cheesecake Cups that’s as enjoyable to make as it is to eat. When you gather around the table with friends and family, these tasty little cups are sure to become a highlight of any meal or gathering. Grab your apron, roll up those sleeves, and get ready for a delightful adventure in the kitchen. Happy baking, friends!
PrintNo-Bake Cheesecake Cups
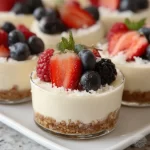
Delightful no-bake cheesecake cups topped with fresh berries, perfect for satisfying your sweet tooth without heating up the oven.
- Prep Time: 15 minutes
- Cook Time: 0 minutes
- Total Time: 240 minutes
- Yield: 4 servings 1x
- Category: Dessert
- Method: No-Bake
- Cuisine: American
- Diet: Vegetarian
Ingredients
- 1 Sleeve Graham Crackers
- 1/4 Cup Sugar
- 5 Tablespoons Butter, Melted
- 2 Packages (8 oz each) Cream Cheese, Softened
- 2 Cups Powdered Sugar
- 2 Cups Heavy Whipping Cream
- 2 Teaspoons Vanilla Extract
- Fresh Berries of Your Choice
Instructions
- Make the crust: Place the graham crackers in a food processor and pulse until fine crumbs form. In a mixing bowl, combine crumbs, sugar, and melted butter; stir until well-coated.
- Prepare individual serving cups: Spoon about 2 tablespoons of the graham cracker mixture into each cup and press down.
- Create the cheesecake filling: Beat softened cream cheese until creamy, then add powdered sugar and vanilla until smooth. In another bowl, whip the heavy cream until soft peaks form and gently fold into the cream cheese mixture.
- Assemble the cheesecake cups: Spoon the cheesecake filling over the crust in each cup. Top with leftover filling if desired.
- Chill and serve: Cover cups with plastic wrap and refrigerate for at least 4 hours or overnight. Top with fresh berries before serving.
Notes
You can pipe the cheesecake mixture for a fancier touch. These cups can be made up to 2 days in advance.
Nutrition
- Serving Size: 1 serving
- Calories: 300
- Sugar: 25g
- Sodium: 150mg
- Fat: 22g
- Saturated Fat: 14g
- Unsaturated Fat: 8g
- Trans Fat: 0g
- Carbohydrates: 35g
- Fiber: 1g
- Protein: 4g
- Cholesterol: 75mg
Keywords: cheesecake, no-bake, dessert, summer, easy recipe