Platefulkitchen
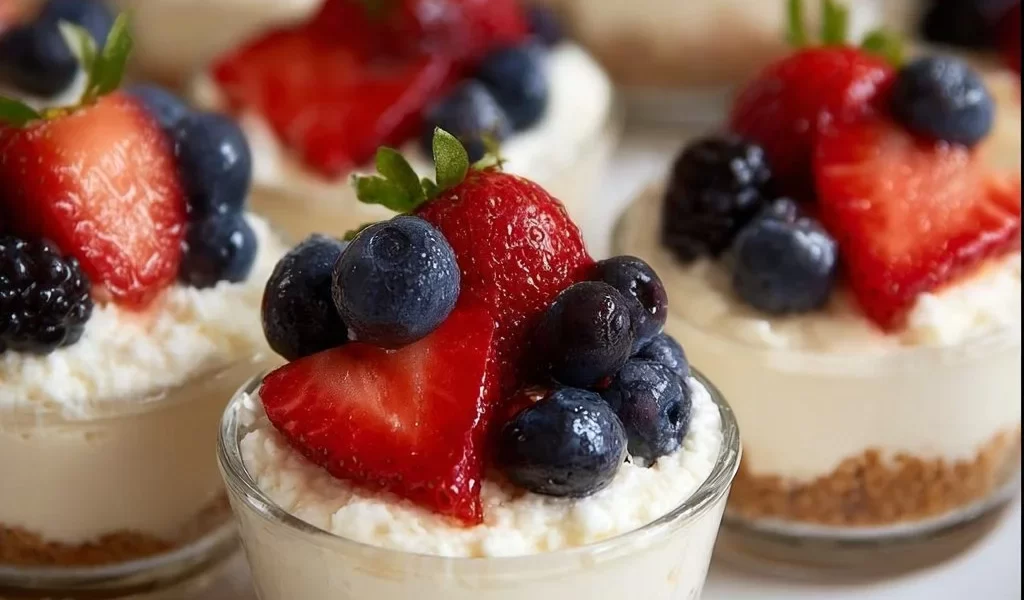
No-Bake Cheesecake Cups: A Simple Delight for Any Occasion
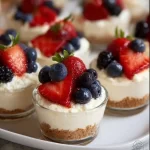
Hello, fellow foodies! Today, we’re diving into a dessert that’s as simple as it is scrumptious: No-Bake Cheesecake Cups! Imagine creamy, dreamy cheesecake nestled in a delightful cup, topped with fresh fruit or a drizzle of rich chocolate. Sounds divine, right? This dessert is the ultimate crowd-pleaser and is perfect for everything from family gatherings to dinner parties or even just a little self-indulgence after a long day.
What I love most about these cheesecake cups is that they are incredibly uncomplicated—no oven required! This means you can whip them up in no time and still impress everyone with your culinary prowess. Plus, they can be made ahead of time, keeping your stress levels low when it’s finally time to entertain. With just a handful of ingredients, you can create a dessert that bursts with flavor and charm, making everyone at the table lean back and sigh with delight.
So grab your mixing bowl, and let’s explore this delightful recipe that’s sure to become a favorite in your household. Alright, let’s roll up our sleeves and dive right in!
Personal Story
Whenever I think of cheesecake, my mind rushes back to summer evenings spent with family at my grandmother’s house. Every year, she’d host a backyard barbecue, and as the sun dipped below the horizon, the sweet aroma of grilled vegetables would mingle with something even more irresistible: her no-bake cheesecake.
I remember sneaking into the kitchen to “help” her with the dessert—though truth be told, I was more interested in licking the beaters than stirring the batter! The moment the cheesecake was set and ready to serve was always magical. She’d scoop out generous portions into little cups, and we’d each claim our favorite toppings—fresh berries, chocolate shavings, or sprinkles, of course.
Those evenings, filled with laughter and the sound of clinking glasses, left a lasting memory. To this day, every spoonful of cheesecake takes me back to those sunny nights with my family, savoring every creamy bite. That love for cheesecake shines through in these No-Bake Cheesecake Cups, and I can’t wait to share it with you!
Ingredients
Let’s gather our ingredients! You will need:
-
8 oz cream cheese, softened
This creamy staple is the heart of our cheesecake. Make sure it’s softened to room temperature for a super smooth texture; if you’re in a pinch, you can also use mascarpone for a slightly different flavor. -
1/2 cup powdered sugar
This sugar gives our cheesecake its sweetness without the graininess that regular sugar would add. If you’re looking for a healthier alternative, consider using coconut sugar or agave syrup—but adjust the quantity as needed! -
1 tsp vanilla extract
A splash of vanilla adds a beautiful depth of flavor to our cheesecake. If you’re feeling adventurous, try experimenting with almond extract or a hint of lemon zest for a refreshing twist! -
1 cup heavy cream
Whipping cream to soft peaks elevates the cheesecake to new heights! For a lighter option, you can substitute with Greek yogurt or a dairy-free alternative like coconut cream. -
1 cup graham cracker crumbs
This crunchy base creates the perfect contrast to the smooth cheesecake. If you’re not a fan of graham crackers, crushed cookies (like Oreos or digestive biscuits) work wonderfully too! -
1/4 cup butter, melted
Butter binds the graham cracker crumbs together for a delicious crust. You can swap this for coconut oil or even melted margarine if you’re looking for a dairy-free alternative. -
Fresh fruit or chocolate for topping (optional)
Your choice of fresh fruit, like strawberries or blueberries, can add a pop of color and flavor. If chocolate’s your thing, feel free to drizzle some rich chocolate sauce or sprinkle chocolate shavings on top.
Step-by-Step Instructions
Now, let’s get down to the fun part—the making of these divine cheesecake cups!
-
Prepare the Crust
Begin by combining the graham cracker crumbs and melted butter in a mixing bowl. The texture should resemble wet sand. If it crumbles too easily, add a tad more butter. Once mixed, press the crumb mixture firmly into the bottom of your serving cups. I love using a small glass or measuring cup to help pack it down nicely! -
Make the Cheesecake Filling
In a large mixing bowl, beat the softened cream cheese until it’s creamy and smooth. Add in the powdered sugar and vanilla extract, mixing until there’s no lumps left. This part is essential for achieving that velvety texture we love! -
Whip the Cream
In a separate bowl, pour the heavy cream and beat on medium speed until soft peaks form. You want the cream to hold its shape but not be overly stiff. Folding in this whipped cream is what gives our cheesecake cups that light and airy texture. -
Combine the Mixtures
Gently fold the whipped cream into the cream cheese mixture using a spatula. Be careful not to deflate the whipped cream too much—you want to keep all that airy goodness. Aim for a light and fluffy filling! -
Assemble Your Cups
Now that you have your creamy filling, it’s time to fill those cups! Spoon the cheesecake mixture gently over the graham cracker crust, smoothing the tops with a spatula. You could also get creative and layer the filling if you’d like, adding some fruit pieces in between those layers for an extra surprise. -
Chill
Cover the cups with plastic wrap and refrigerate for at least 4 hours, though overnight is best if you can manage to wait! This helps the flavors meld together beautifully and gives the cheesecake time to set. -
Top & Serve
Just before serving, add your desired toppings—be it fresh berries, a sprinkle of chocolate, or even a dollop of whipped cream. Presentation matters, so don’t be afraid to get a little fancy with your plating!
Serving Suggestions
To serve your No-Bake Cheesecake Cups, simply place them on a platter or individual dessert plates, garnished with a sprig of mint or a slice of fruit for a pop of color. These delightful cups can also double as a serious statement piece at any gathering—just set them down at the center of your table, and watch the guests crowd around!
Recipe Variations
Want to switch things up? Here are some creative twists you can try:
-
Berry Burst: Blend some strawberries or raspberries into the cheesecake filling for a fruity flavor explosion!
-
Chocolate Dream: Incorporate melted chocolate into the filling for a richer experience or use chocolate cookie crumbs for your crust.
-
Nutty Delight: Add chopped nuts into the crust for extra texture, or sprinkle some on top along with your choice of toppings.
-
Caramel Swirl: Drizzle caramel sauce through the cheesecake filling before chilling for a decadent sweet twist.
-
Spiced Autumn: Add a teaspoon of pumpkin spice or cinnamon for a cozy fall-inspired version.
Chef’s Notes
As with any family recipe, my No-Bake Cheesecake Cups have evolved over the years! At first, I was all about the classic flavors—just cream cheese, sugar, and vanilla. But then, I began to experiment with different toppings and variations, and let me tell you, the joy of trying new flavors is unmatched.
One time, I tried a mango purée and added a touch of lime zest for a tropical vibe, and let’s just say it was a huge hit! Don’t hesitate to embrace your inner kitchen artist—this recipe is forgiving and perfect for those moments when you want to let your creativity shine.
FAQs and Troubleshooting
-
Why is my cheesecake filling lumpy?
Make sure your cream cheese is softened to room temperature. Cold cream cheese won’t blend well and can lead to a lumpy texture. -
How long can I keep these cheesecake cups?
These cheesecake cups can be stored in the fridge for up to 4-5 days. Just keep them covered so they stay fresh! -
Can I freeze these cheesecake cups?
Yes! They freeze beautifully. Just make sure they’re well-wrapped and airtight. When you’re ready to enjoy them, thaw in the fridge overnight. -
What if my whipped cream isn’t stiffening?
Ensure your bowl and beaters are clean and dry before whipping the cream. If the cream continues to be soft, it may be too warm, so try chilling your mixing bowl and ingredients before starting again.
Nutritional Info
Note: For a general idea, the following is based on standard serving size.
- Calories: 250–350
- Protein: 3g
- Carbohydrates: 25g
- Fat: 18g
This is an approximation and can vary significantly based on ingredient brands and substitutes used.
There you have it, my friends: a delightful, easy-to-make No-Bake Cheesecake Cups recipe that’s sure to become a favorite in your home! I hope you find joy in making these and, most importantly, enjoy every bite. Happy cooking! 🎉
PrintNo-Bake Cheesecake Cups
Delicious and easy-to-make no-bake cheesecake cups, perfect for any occasion.
- Prep Time: 15 minutes
- Cook Time: 0 minutes
- Total Time: 240 minutes
- Yield: 4 servings 1x
- Category: Dessert
- Method: No-Bake
- Cuisine: American
- Diet: Vegetarian
Ingredients
- 8 oz cream cheese, softened
- 1/2 cup powdered sugar
- 1 tsp vanilla extract
- 1 cup heavy cream
- 1 cup graham cracker crumbs
- 1/4 cup butter, melted
- Fresh fruit or chocolate for topping (optional)
Instructions
- Prepare the Crust: Combine the graham cracker crumbs and melted butter in a mixing bowl and press the mixture firmly into the bottom of serving cups.
- Make the Cheesecake Filling: Beat the softened cream cheese until creamy, then mix in the powdered sugar and vanilla extract until smooth.
- Whip the Cream: In a separate bowl, beat the heavy cream until soft peaks form.
- Combine the Mixtures: Gently fold the whipped cream into the cream cheese mixture without deflating the whipped cream too much.
- Assemble Your Cups: Spoon the cheesecake mixture over the graham cracker crust in the cups.
- Chill: Cover the cups with plastic wrap and refrigerate for at least 4 hours.
- Top & Serve: Add your desired toppings just before serving.
Notes
These cheesecake cups can be stored in the fridge for up to 4-5 days and can also be frozen.
Nutrition
- Serving Size: 1 serving
- Calories: 300
- Sugar: 20g
- Sodium: 250mg
- Fat: 18g
- Saturated Fat: 11g
- Unsaturated Fat: 7g
- Trans Fat: 0g
- Carbohydrates: 25g
- Fiber: 1g
- Protein: 5g
- Cholesterol: 43mg
Keywords: cheesecake, dessert, no-bake, easy recipe, sweet treat