Platefulkitchen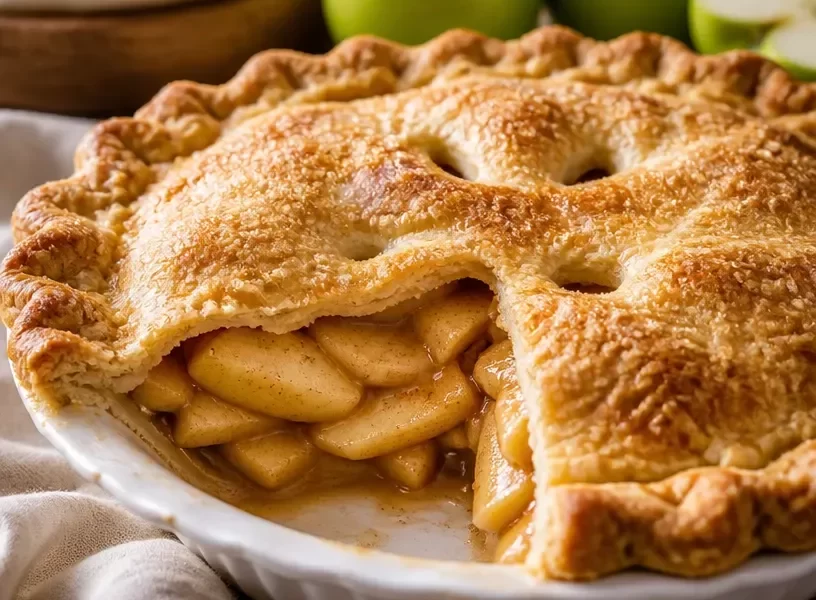
Classic Apple Pie: A Slice of Nostalgia
Hello, lovely food lovers! Today, we’re diving into something that warms the soul: Classic Apple Pie. There’s just something magical about the golden, flaky crust holding in sweet, tender apples kissed with cinnamon. It’s not just a dessert; it’s a comforting hug on a plate, often bringing back cherished memories around the dinner table.
Imagine walking into your home on a crisp fall day and feeling that warm embrace of cinnamon and baked apples wafting through the air. That’s the kind of nostalgia I want to share with you today.
Growing up, my family had a tradition of baking apple pies during the harvest season. My grandmother would gather us in her cozy kitchen, flour dusting the air and her rolling pin in hand, as she guided us with love and laughter. “The secret is to choose the right apples, dear,” she would say, her eyes twinkling as she handed me the slicing knife. I can still hear the sound of those apples crunching as we peeled and sliced them together, with flour smudges on our cheeks from the inevitable pie-making chaos.
Apple pie was more than just a dessert; it was a way for us to connect, share stories, and create delightful memories. Sharing warm slices with a scoop of vanilla ice cream was our way of celebrating. Each bite transported us back to the table of love and laughter, teaching me that cooking and baking could be a beautiful way to create bonds.
Now, I’m sharing my Classic Apple Pie recipe with you. It’s straightforward yet deeply satisfying, perfect for both beginner and experienced bakers alike. Let’s get those delicious aromas filling your kitchen, shall we?
Ingredients
Here’s what you’ll need to make this delightful Classic Apple Pie:
-
2 pie crusts
- You can use store-bought for convenience, but homemade crust takes this pie to the next level. You’ll need flour, butter, salt, and water—simple and satisfying!
-
6 Granny Smith apples, peeled and sliced
- Choose these tart beauties for the perfect balance against the sweetness of the sugars. You can substitute with Honeycrisp or Fuji apples if you prefer a sweeter pie.
-
3/4 cup granulated sugar
- This sugar helps amp up the sweetness of the apples. If you want a lower-sugar option, feel free to reduce this amount; your pie will still taste fabulous!
-
1/4 cup brown sugar
- The molasses in brown sugar adds a lovely depth of flavor. Light or dark brown sugar works here; go with what you have on hand!
-
2 tbsp all-purpose flour
- This helps thicken the juices released from the apples while baking, preventing a soggy bottom crust. You can swap this for cornstarch or arrowroot powder for a gluten-free option.
-
2 tsp cinnamon
- It’s the star spice in this pie, bringing warmth and coziness. If you want to mix things up, try adding nutmeg or allspice for a bit of a kick!
-
1 tbsp lemon juice
- This helps brighten the flavor of the apples and prevents them from browning before baking. If you don’t have fresh lemons, bottled lemon juice will work fine too.
Step-by-Step Instructions
Let’s get baking! Follow along as I guide you through this delightful process step by step.
Step 1: Preheat and Prepare
Preheat your oven to 425°F (220°C). This high heat will help create that golden crust we all crave. While the oven heats up, prepare your pie crusts. If you’re using store-bought crusts, let them sit at room temperature for about 10 minutes to make them easier to work with. If making homemade crusts, roll them out to fit your pie dish, approximately 1/8-inch thick.
Step 2: Prepare the Filling
In a large mixing bowl, toss together your sliced Granny Smith apples, granulated sugar, brown sugar, flour, cinnamon, and lemon juice. As you mix, the apples will release their juices, and the sugars and flour will coat them beautifully. This step is essential for building a delicious filling – every bite should be bursting with flavor! Don’t forget to taste a little of your filling mixture. You might just find yourself snacking on bits of apple while you’re at it!
Step 3: Assemble the Pie
Place one of the pie crusts into your pie dish, pressing it firmly against the sides. Fill it with the apple mixture, mounding it in the center to create a lovely dome. This isn’t just for looks—it allows for a slight overflow of juices as the pie bakes, resulting in that lovely caramelization, which we adore! Gently place your second crust over the top. Pinch the edges to seal, and you can make a decorative edge with your fingers or a fork.
Step 4: Vent and Add Finishing Touches
Make a few small slits in the top crust to allow steam to escape—this will prevent your pie from bubbling over in the oven. If you want to get fancy, you can create a lattice top! Just cut strips of pie crust and weave them over the apples for a beautiful presentation. Brush the top crust with a little egg wash (a beaten egg mixed with a splash of water) to give it a lovely golden hue while baking. If you’re feeling adventurous, sprinkle some sugar on top for a sweet crunch!
Step 5: Bake It Up!
Place your pie in the oven and bake at 425°F (220°C) for 15 minutes. Then, reduce the temperature to 350°F (175°C) and bake for an additional 35-45 minutes, or until the apples are bubbly and the crust is golden brown. I like to place a baking sheet on the bottom rack to catch any drips—better safe than sorry!
Step 6: Cooling Time
Once the pie is out of the oven, let it cool for at least an hour. This cooling time allows the filling to set up beautifully. Trust me, I know it’s hard to resist the smell wafting through your home, but giving it that time is key!
Serving Suggestions
When it’s finally time to serve your Classic Apple Pie, I recommend slicing it up and adding a scoop of vanilla ice cream or a dollop of freshly whipped cream on the side. A sprinkle of cinnamon on top adds that final cozy touch. For a rustic feel, serve it straight from the pie dish at the table, allowing everyone to help themselves. What could be better than gathering around to enjoy a slice of warm pie with loved ones?
Recipe Variations
Want to mix things up a bit? Here are a few creative twists you can try:
-
Caramel Apple Pie: Drizzle some caramel sauce over your apple filling before adding the top crust for an indulgent treat.
-
Spiced Apple Pie: Add a pinch of nutmeg or allspice to the apple mixture for an intriguing flavor profile.
-
Cranberry Apple Pie: Toss in a cup of fresh or frozen cranberries to give a tart contrast to the sweetness of the apples.
-
Cheddar Apple Pie: Incorporate shredded sharp cheddar cheese into your crust for a delightful savory kick!
-
Gluten-Free Apple Pie: Substitute all-purpose flour with a 1:1 gluten-free blend for equally delicious results.
Chef’s Notes
This Classic Apple Pie has been a staple in my baking repertoire for years. What I love most about it is how adaptable it is. Over time, I’ve played with different types of apples and spices, even experimenting with adding a hint of bourbon to the filling! One family member always claims it tastes even better the next day (if there are leftovers, of course!). So feel free to make this pie a day in advance and let those flavors meld overnight for an even more scrumptious experience.
FAQs and Troubleshooting
Q: Can I use frozen apples?
A: Absolutely! Just make sure to thaw them out and drain the excess liquid before adding them to your filling mixture.
Q: Why is my bottom crust soggy?
A: Soggy bottoms can happen if the filling isn’t thickened properly, or if you place it in the oven without giving it enough ventilation. Use the flour and ensure you let the pie cool adequately before slicing.
Q: What if my pie crust cracks?
A: Pie crust can crack for several reasons, including overworking the dough or not enough fat. Patch it up before baking with a bit of water and an extra piece of dough.
Q: How do I store leftover pie?
A: Cover it loosely with plastic wrap or aluminum foil and store it in the fridge for up to 3-4 days. You can also freeze slices for up to three months; just wrap each slice tightly in plastic wrap, then foil.
There you have it, my dear foodies! Your guide to making a delightful Classic Apple Pie that brings warmth not just to your taste buds but also to your heart. So grab your ingredients, channel your inner pie chef, and let’s create some delicious memories together! Happy baking! 🍏🥧
PrintClassic Apple Pie
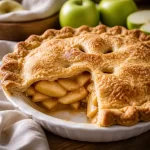
A delightful classic dish filled with sweet, tender apples and warm cinnamon, perfect for any occasion.
- Prep Time: 30 minutes
- Cook Time: 45 minutes
- Total Time: 75 minutes
- Yield: 8 servings 1x
- Category: Dessert
- Method: Baking
- Cuisine: American
- Diet: Vegetarian
Ingredients
- 2 pie crusts
- 6 Granny Smith apples, peeled and sliced
- 3/4 cup granulated sugar
- 1/4 cup brown sugar
- 2 tbsp all-purpose flour
- 2 tsp cinnamon
- 1 tbsp lemon juice
Instructions
- Preheat your oven to 425°F (220°C).
- Prepare your pie crusts.
- Toss together sliced apples, granulated sugar, brown sugar, flour, cinnamon, and lemon juice in a large bowl.
- Place one pie crust in your pie dish and fill it with the apple mixture.
- Vent the top crust with small slits.
- Brush the crust with egg wash and sprinkle sugar if desired.
- Bake for 15 minutes, then reduce the temperature to 350°F (175°C) and bake for an additional 35-45 minutes.
- Let the pie cool for at least an hour before serving.
Notes
Serve warm with vanilla ice cream or whipped cream. This pie can be made a day in advance for even better flavor.
Nutrition
- Serving Size: 1 slice
- Calories: 320
- Sugar: 24g
- Sodium: 150mg
- Fat: 12g
- Saturated Fat: 5g
- Unsaturated Fat: 6g
- Trans Fat: 0g
- Carbohydrates: 48g
- Fiber: 3g
- Protein: 2g
- Cholesterol: 40mg
Keywords: apple pie, dessert, baking, classic recipes