Platefulkitchen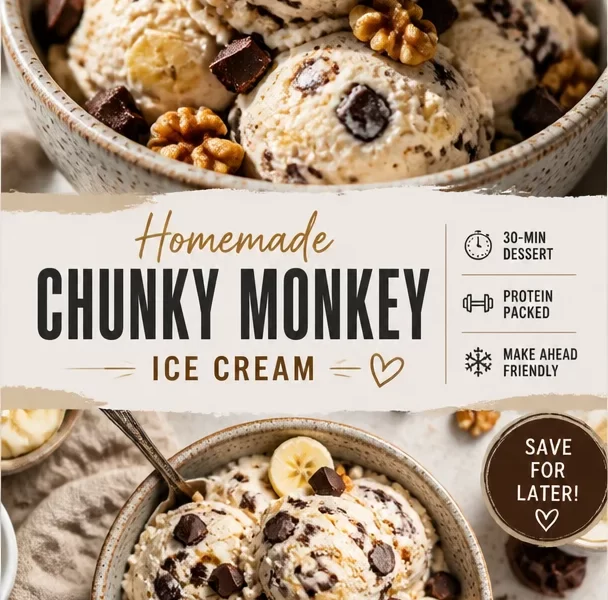
Homemade Chunky Monkey Ice Cream
Introduction
Hey there, fellow food lovers! 🌟 If you’ve ever had a moment where the heat is rising, the kids are buzzing with energy, or you just need that extra bit of sweetness to end your day, I have the perfect treat for you: Homemade Chunky Monkey Ice Cream!
Picture this: It’s a warm summer evening, the sun is just beginning to dip below the horizon, and you’re sitting on the porch with a bowl of creamy, dreamy, banana-flavored ice cream, chunks of chocolate dancing around as you take that first, glorious bite. Honestly, is there anything better? This luscious ice cream is not just about flavors; it’s about memories, laughter, and indulgence combined into each spoonful.
Making ice cream at home may sound intimidating, but trust me—it’s easier than you think and oh-so-rewarding. With just a handful of ingredients and some love, you’ll be whipping up a batch that rivals anything you could buy at the store. Plus, there’s something profoundly satisfying about saying, “I made this!” when friends and family ask for seconds or thirds. 😉
What really makes Chunky Monkey Ice Cream special is its delightful combination of ripe bananas, rich chocolate chunks, and crunchy walnuts. It all harmonizes to create that nostalgic flavor reminiscent of your favorite ice cream parlor—and did I mention it’s super customizable? Whether you’re vegan, gluten-free, or just love to experiment, there’s plenty of room for fun here! So grab your ice cream maker (or bowls if you don’t have one), and let’s dive into this culinary adventure together!
Personal Story
Homemade ice cream was a staple in my childhood home, especially during summertime. My mom would pull out her trusty old ice cream maker—an iconic, crank-style version that often took more energy than we anticipated. But nothing could compare to the sheer joy of watching it come to life after all that hand-cranking! One of my fondest memories is the day we decided to create what we called “Banana Bonanza,” a recipe inspired by a dear family friend who always brought over her special banana bread.
As mom mashed the ripe bananas, their sweetness filled the kitchen, and the sound of laughter echoed around us. During that magical summer, we experimented with different add-ins—chocolate chips, nuts, and even a splash of rum when our parents weren’t looking! Each scoop transported me back to that sun-kissed porch, surrounded by family and friends, every bite enveloped with happiness. Fast forward to today, and I’m thrilled to share my own version, Chunky Monkey Ice Cream, with you. It’s a delicious nod to those cherished summer days and a perfect way to create new memories in your own kitchen.
Ingredients
Here’s what you’ll need to whip up your Homemade Chunky Monkey Ice Cream:
-
2 ripe bananas
Choose bananas that have plenty of brown spots; the riper, the better! They provide that luscious sweetness and vibrant banana flavor. If you don’t have ripe ones, you can pop them in a paper bag with an apple to speed up the ripening process. -
2 cups heavy cream
Heavy cream is what makes this ice cream decadently rich and creamy. If you want a lighter version, you could substitute half of it with coconut cream for a fun twist! -
1 cup whole milk
Whole milk balances out the creaminess of the heavy cream. You can swap it for almond or oat milk for a dairy-free version, but the texture may slightly change. -
3/4 cup sugar
This sweetener helps attain the right texture and flavor. You can adjust it to taste or use alternatives like maple syrup or agave—just remember it may affect the sweetness and creaminess slightly! -
1 teaspoon vanilla extract
A splash of vanilla extract takes your ice cream to the next level. You can use pure vanilla or even try vanilla bean for a more intense flavor! -
1/2 cup walnuts, chopped
Walnuts add a delightful crunch and nutty flavor that complements the bananas perfectly. If you have nut allergies, feel free to swap them out for chocolate chunks or sunflower seeds! -
1/2 cup chocolate chunks
Dark, milk, or even white chocolate will work wonderfully here! If you’re feeling adventurous, try using peanut butter chips for a fun twist instead!
Step-by-Step Instructions
Ready to make your Chunky Monkey Ice Cream? Let’s get into the nitty-gritty (and utterly delicious) details!
-
Prepare Your Bananas:
Start by peeling those ripe bananas and placing them in a mixing bowl. Using a fork or a potato masher, mash them until they reach a smooth consistency. You want some bits of banana for texture, but no whole chunks—no one wants to bite into that while enjoying their ice cream! -
Combine the Base:
In a separate large bowl, whisk together the heavy cream, whole milk, sugar, and vanilla extract. Doing this by hand will give you a light workout, but it’s worth it! Make sure the sugar dissolves completely to avoid a grainy texture in your ice cream. Once combined, gently fold the mashed bananas into the mixture until they’re thoroughly incorporated. -
Chill Your Mixture:
Cover the bowl with plastic wrap and pop it in the fridge for at least 1 hour. This step is crucial because it helps enhance the flavor and ensures your ice cream churns beautifully! -
Churn the Ice Cream:
Once chilled, pour the mixture into your ice cream maker. Follow your machine’s specific instructions, but generally, you’ll churn it for about 20-25 minutes until it reaches a soft-serve consistency. This is when the magic starts to happen! If you don’t have an ice cream maker, you could pour the mixture into a shallow dish and stir it every 30 minutes until it firms up (will take about 3-4 hours). -
Add Chocolate & Walnuts:
In the last few minutes of churning, gently fold in the chopped walnuts and chocolate chunks. This is where you can get creative! If you have a little extra chocolate lying around, toss in some more for an explosion of flavor. -
Freeze to Firm Up:
Transfer the churned ice cream to an airtight container. Smooth the top with a spatula, press a piece of waxed paper on top to prevent ice crystals, and seal with a lid. Freeze for at least four hours or overnight to let it solidify fully. -
Serve Up the Goodness:
When you’re ready to enjoy, let the ice cream sit at room temperature for about 5-10 minutes before scooping; this helps soften it just enough for that perfect scoop! Serve it up in bowls or cones, and feel free to top it with a drizzle of honey or caramel sauce for an extra treat.
Serving Suggestions
Here’s where the fun really begins! Serve your Chunky Monkey Ice Cream in vintage bowls or waffle cones for a casual yet stylish vibe. Fancy it up with a homemade hot fudge sauce or a sprinkling of extra chopped nuts on top. You can even create a luscious sundae by layering it with whipped cream and fresh banana slices, bringing back those nostalgic summer memories in every delightful bite!
Recipe Variations
Let’s get adventurous! Here are a few twists on the classic Chunky Monkey Ice Cream:
- Nut-Free Delight: Omit the walnuts and replace them with sunflower seeds or toasted coconut for crunch without the nuts.
- Vegan Version: Substitute all dairy products with coconut cream and plant-based milk, replacing sugar with maple syrup for an extra tropical flavor!
- Peanut Butter Swirl: Add a swirl of creamy or crunchy peanut butter into your mixture before freezing for an irresistible treat!
- Minty Fresh: Toss in some mint extract for a refreshing minty twist, balancing delightfully with the chocolate and banana.
- Caramel It Up: Drizzle in caramel sauce during the last minutes of churning for a sweet and gooey surprise every scoop!
Chef’s Notes
Everyone has that one recipe that becomes a family favorite, and Chunky Monkey Ice Cream has certainly made its mark in my culinary repertoire! Over the years, I’ve played around with varying ingredients, and every time, this ice cream thickens hearts as much as it does per scoop. I still remember that one time when I decided to double the chocolate chunks, and let’s just say it may have resulted in a case of pure deliciousness that mysteriously disappeared in a matter of hours. It’s recipes like these that remind me of the joy of sharing food and laughter around the table, and I hope this becomes a cherished recipe in your home as well!
FAQs and Troubleshooting
Q: My homemade ice cream is too hard after freezing. What can I do?
A: If your ice cream is too hard, it’s likely that it needs a little time to soften. Let it sit at room temperature for 5-10 minutes before scooping. Also, adding more sugar or alcohol (like a splash of rum) can help keep it creamy.
Q: Can I use frozen bananas?
A: Absolutely! Frozen bananas work wonderfully and will add a rich creamy texture. Just make sure to thaw them slightly before mashing.
Q: What if I don’t have an ice cream maker?
A: No problem! Just pour the mixture into a shallow dish and freeze. Stir every 30 minutes for the first 2-3 hours to break up ice crystals—this helps mimic the churning process.
Q: Can I make this without walnuts or chocolate?
A: Yes, you can! Feel free to swap these for your favorite mix-ins or let the banana flavor shine through all on its own!
Nutritional Info
Each serving of Chunky Monkey Ice Cream (1/2 cup) contains approximately:
- Calories: 350
- Total Fat: 24g
- Saturated Fat: 14g
- Cholesterol: 80mg
- Sodium: 40mg
- Total Carbohydrates: 37g
- Sugars: 28g
- Protein: 4g
(Please note these are estimates, and actual nutritional information may vary based on specific brands and ingredient choices.)
So there you have it, my flavorful journey to Homemade Chunky Monkey Ice Cream! I can’t wait for you to try this recipe and create your own sweet memories in the kitchen. Let’s fill our plates with sweetness—until next time, happy cooking! 🍌🍦
PrintHomemade Chunky Monkey Ice Cream
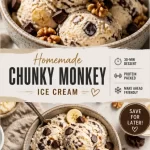
A creamy, dreamy banana-flavored ice cream with chocolate chunks and walnuts that brings back nostalgic summer memories.
- Prep Time: 15 minutes
- Cook Time: 0 minutes
- Total Time: 75 minutes
- Yield: 4 servings 1x
- Category: Dessert
- Method: Freezing
- Cuisine: American
- Diet: Vegetarian
Ingredients
- 2 ripe bananas
- 2 cups heavy cream
- 1 cup whole milk
- 3/4 cup sugar
- 1 teaspoon vanilla extract
- 1/2 cup walnuts, chopped
- 1/2 cup chocolate chunks
Instructions
- Prepare your bananas: Peel and mash the ripe bananas until smooth, keeping some texture.
- Combine the base: Whisk together heavy cream, whole milk, sugar, and vanilla extract until sugar dissolves, then fold in the mashed bananas.
- Chill your mixture: Cover and refrigerate for at least 60 minutes.
- Churn the ice cream: Pour into an ice cream maker and churn for 20-25 minutes until soft-serve consistency.
- Add chocolate and walnuts: Gently fold in walnuts and chocolate chunks during the last minutes of churning.
- Freeze to firm up: Transfer to an airtight container and freeze for at least 4 hours or overnight.
- Serve up the goodness: Allow to sit at room temperature for 5-10 min before scooping, and enjoy in bowls or cones.
Notes
Customize with nut alternatives or add-ins like peanut butter or caramel for a fun twist.
Nutrition
- Serving Size: 1/2 cup
- Calories: 350
- Sugar: 28g
- Sodium: 40mg
- Fat: 24g
- Saturated Fat: 14g
- Unsaturated Fat: 8g
- Trans Fat: 0g
- Carbohydrates: 37g
- Fiber: 1g
- Protein: 4g
- Cholesterol: 80mg
Keywords: ice cream, homemade, dessert, banana, chocolate, walnuts