Platefulkitchen
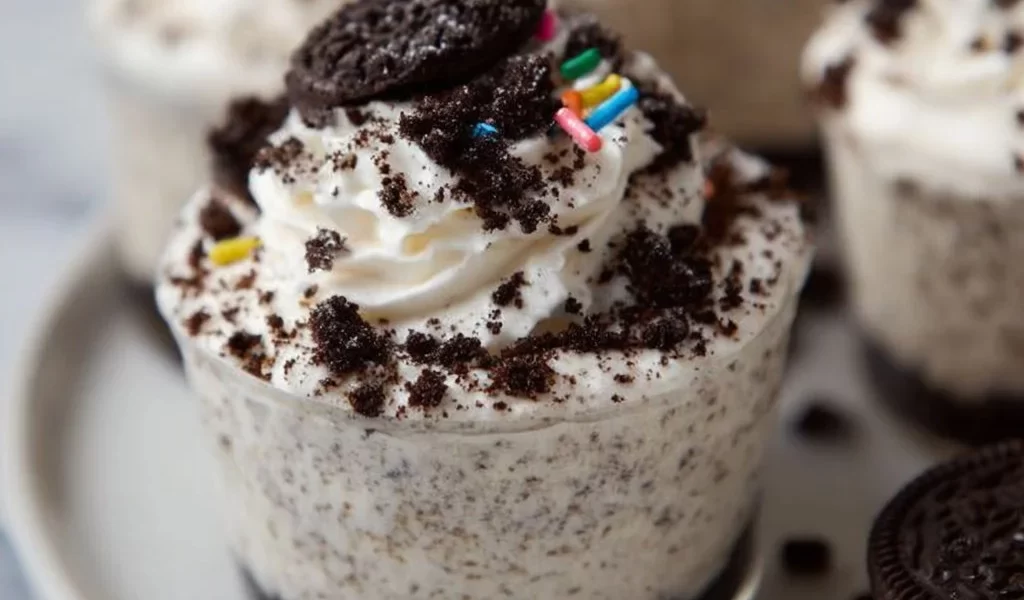
Indulge in Oreo No-Bake Cheesecake Cups: A Sweet Escape!
Hello, my fellow food lovers! Today, I’m thrilled to share one of the simplest yet most delightful recipes that swirl you away into a world of creamy sweetness and chocolatey goodness. Yes, I’m talking about Oreo No-Bake Cheesecake Cups—a dessert that feels like a hug in a glass. Whether you’re hosting a gathering, celebrating a birthday, or simply treating yourself on a quiet night, these little cups will undoubtedly bring smiles and satisfaction. So, grab a spoon, and let’s dive into this decadent treat!
A Bite of Nostalgia
Let me take you back to a cozy afternoon spent in my grandmother’s kitchen. Picture this: the sun streaming through the window, and the sweet aroma of vanilla and chocolate wafting in the air as she whipped up one of her famous desserts. One of my absolute favorites was a creamy cheesecake version, and I remember being captivated by how the simple ingredients could create something so special.
We would gather around her dining table, all eyes on the dessert as she plated it with a flourish. I still remember the crunch of the Oreo crust, perfectly mingling with the fluffy cheesecake filling. That moment sparked my love for creating sweets from simple ingredients, and now I get to share my version with you! Instead of the traditional way, we’re going for a no-bake version that’s just as delicious and way easier. Let’s bring back those sweet memories in a fun and effortless way!
Ingredients
Here’s everything you’ll need to whip up these delightful little cheesecake cups:
-
1 (8 oz) block of cream cheese, softened
The star of our cheesecake! It adds that rich, creamy texture. If you’re looking for a lower-fat option, you can swap it for reduced-fat cream cheese, but the consistency might change slightly. -
1 (8 oz) tub of Cool Whip or whipped topping
This is what gives our cheesecake its light, fluffy texture. If you want a more natural option, homemade whipped cream works wonders! Just whip some heavy cream until soft peaks form. -
2/3 cup powdered sugar
This sweetens our cheesecake without leaving any grainy texture behind. Can’t find powdered sugar? You can make your own by blending granulated sugar until fine. -
1 teaspoon vanilla extract
A splash of vanilla adds warmth and depth to our dessert. If you’re out of vanilla, try almond extract for a nutty twist (but be careful—it’s potent)! -
24-26 Oreo cookies (plus more for topping)
The crunchy, chocolatey goodness that creates our base. If you’re feeling adventurous, try using different flavors of Oreos, like mint or birthday cake, for a fun new take!
Step-by-Step Instructions
Ready to bring these cups to life? Follow along for a flawless execution of this recipe!
-
Prep Your Ingredients
Begin by gathering all your ingredients. Trust me, having everything ready makes the process smoother and more enjoyable. No one likes running around the kitchen at the last minute! -
Cream the Cheese
In a large mixing bowl, beat the softened cream cheese using an electric mixer on medium speed until it’s smooth and free of lumps. This should take about 2 minutes. A tip from the kitchen: If your cream cheese is too cold, it won’t incorporate well, so make sure it’s softened to room temperature! -
Add Sugar and Vanilla
Gradually add the powdered sugar to the cream cheese, continuing to mix. Then, pour in the vanilla extract. Keep mixing until well combined. The mixture should be creamy and delicious! -
Fold in the Cool Whip
Here comes the magic: gently fold the Cool Whip into the cream cheese mixture. Take your time with this step to maintain that light, airy texture. Use a rubber spatula and make sweeping motions; you want to incorporate without deflating the fluffy goodness. -
Crush the Oreos
Take about 20 Oreo cookies and place them in a resealable plastic bag. Crush them using a rolling pin or your hands until you get fine crumbs. This will be our base layer. Little tip: save a few whole Oreos for garnish or crumble them for added texture on top! -
Assemble the Cups
It’s time to layer! Start by adding a generous spoonful of the Oreo crumbs into the bottom of your serving cups (about 1-2 tablespoons). Next, spoon in a layer of the cheesecake mixture over the crumbs. Repeat this process until the cups are almost full, finishing with a layer of cheesecake. -
Chill and Set
Cover your cups with plastic wrap, and pop them into the fridge for at least 4 hours (or overnight, if you can wait!). The chilling time allows the flavors to meld together beautifully. -
Garnish and Serve
Before serving, crush a couple of Oreos and sprinkle them over the top of each cup for that extra crunch. You can also add a dollop of Cool Whip if you like! Now, just take a moment to appreciate your beautiful creation before digging in.
Serving Suggestions
plate those gorgeous cheesecake cups and present them on a playful dessert platter or stand to impress your guests! For a casual vibe, place them on a picnic table with colorful plates and napkins. Pair them with some fresh berries or a drizzle of chocolate sauce for a gourmet touch.
Recipe Variations
Want to switch things up? Here are a few creative twists for your Oreo No-Bake Cheesecake Cups:
- Mint Chocolate: Use mint-flavored Oreos and a drop of peppermint extract to bring a refreshing twist.
- Peanut Butter Swirl: Add a swirl of peanut butter to the cheesecake mixture for a nutty, creamy blend.
- Fruit Infusion: Mix in some crushed fruit, such as raspberries or strawberries, into the cheesecake for a fruity punch.
- Coffee Lovers: Add a teaspoon of espresso powder into the cream cheese mixture for a mocha flavor that will thrill coffee enthusiasts.
- Nutty Delight: Fold in some chopped nuts like pecans or walnuts for added texture and flavor.
Chef’s Notes
These Oreo No-Bake Cheesecake Cups have become a staple in my kitchen, and they never fail to delight anyone who tries them! I remember whipping up a batch for a family get-together last summer, and they disappeared in no time. Everyone was raving about how easy they were to make, and I had to chuckle thinking back to my grandmother’s elaborate baking sessions.
Over time, I’ve played around with different variations, but the classic Oreo version remains a beloved favorite. The smiles on people’s faces as they enjoy these little delights make it all worthwhile. So, whether you’re making them for a special occasion or just to indulge in a sweet treat, trust me, you’re in for a delicious experience!
FAQs and Troubleshooting
Here are some common questions and potential bumps you might encounter while making your Oreo No-Bake Cheesecake Cups:
1. My cheesecake mixture is too runny. What did I do wrong?
This could be because the cream cheese was not softened enough, or you may have added too much whipped topping. Make sure to beat the cream cheese until it’s completely smooth before mixing with the whipped topping.
2. How long do these cheesecake cups last in the fridge?
They can be stored in an airtight container for up to 4-5 days. Just be sure to keep them chilled until serving!
3. Can I make these ahead of time?
Absolutely! In fact, making them a day before gives the flavors a chance to develop beautifully. Just store them in the fridge and they’ll be ready when you are!
4. How do I prevent the Oreos from getting soggy?
Layering is key! The Oreo crust should be at the bottom, and it helps if you don’t let the cups sit too long before serving. The crunch and texture are what make this dessert so enjoyable!
Nutritional Info
While I usually encourage enjoying desserts in moderation, here are some approximate nutritional facts per serving (based on 8 servings):
- Calories: 350
- Total Fat: 22g
- Sodium: 180mg
- Total Carbohydrates: 34g
- Sugars: 22g
- Protein: 4g
Keep in mind that ingredient choices may alter these values!
There you have it, folks! Your delightful journey into the world of Oreo No-Bake Cheesecake Cups! I hope you enjoyed cooking, reminiscing, and dreaming about the delicious moments we create in the kitchen. Remember, food has the magical ability to bring us together, serving not just as nourishment, but as a vessel for memories and love.
As you savor these sweet cups, I invite you to share your experience or any twists you added to the recipe in the comments below. Whether you’re a seasoned chef or a kitchen newbie, let’s keep the conversation going and inspire one another.
Happy cooking and enjoy every sweet bite! 🍰✨
PrintOreo No-Bake Cheesecake Cups
A delightful and easy no-bake dessert featuring creamy cheesecake and crunchy Oreo layers.
- Prep Time: 15 minutes
- Cook Time: 0 minutes
- Total Time: 240 minutes
- Yield: 8 servings 1x
- Category: Dessert
- Method: No Bake
- Cuisine: American
- Diet: Vegetarian
Ingredients
- 1 (8 oz) block of cream cheese, softened
- 1 (8 oz) tub of Cool Whip or whipped topping
- 2/3 cup powdered sugar
- 1 teaspoon vanilla extract
- 24–26 Oreo cookies (plus more for topping)
Instructions
- Begin by gathering all your ingredients.
- Beat the softened cream cheese using an electric mixer on medium speed until smooth.
- Gradually add the powdered sugar to the cream cheese, mixing well and then pour in the vanilla extract.
- Gently fold the Cool Whip into the cream cheese mixture.
- Crush about 20 Oreo cookies in a resealable plastic bag until you get fine crumbs.
- Start by adding a spoonful of Oreo crumbs into the bottom of your serving cups.
- Spoon in a layer of the cheesecake mixture over the crumbs, repeating until the cups are full.
- Cover the cups with plastic wrap and chill in the fridge for at least 240 minutes.
- Before serving, sprinkle crushed Oreos over the top of each cup.
Notes
Store cups in an airtight container in the fridge for up to 4-5 days.
Nutrition
- Serving Size: 1 serving
- Calories: 350
- Sugar: 22g
- Sodium: 180mg
- Fat: 22g
- Saturated Fat: 10g
- Unsaturated Fat: 9g
- Trans Fat: 0g
- Carbohydrates: 34g
- Fiber: 1g
- Protein: 4g
- Cholesterol: 30mg
Keywords: Oreo, cheesecake, no-bake dessert, easy dessert, sweet treat