Platefulkitchen
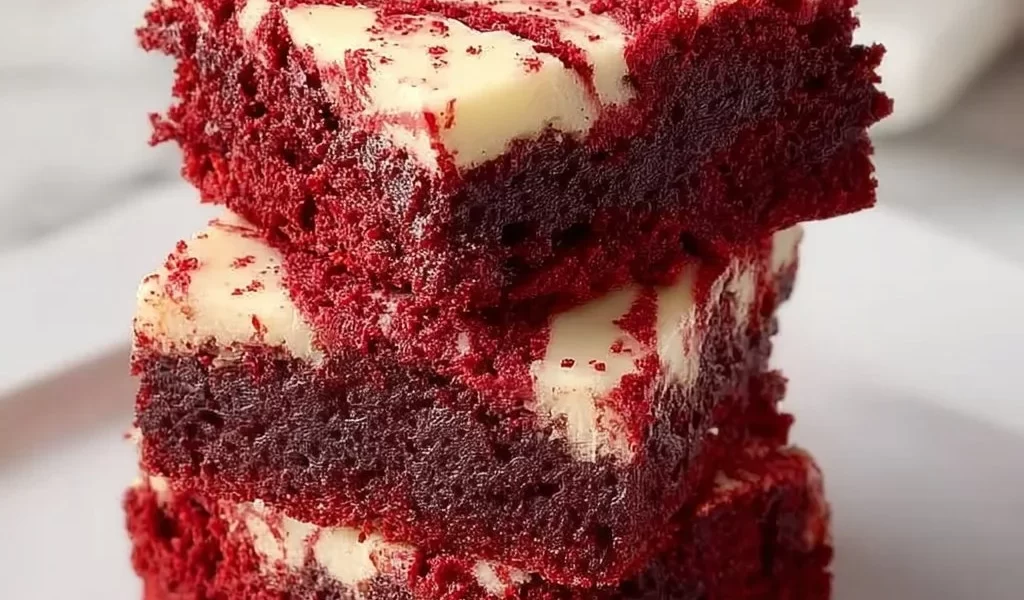
The Ultimate Red Velvet Brownies: A Decadent Twist on a Classic
Hey there, fellow food lovers! I’m so glad you’re joining me today because we’re about to embark on a sweet journey into the world of Red Velvet Brownies. Think of luscious red velvet cake—rich, velvety, and utterly indulgent—but transformed into fudgy brownies that are sure to leave everyone craving more. These brownies are perfect for sharing or savoring all by yourself, and they carry that signature visual pop that makes every bite as delightful to the eyes as it is to the palate!
Red velvet desserts have been around for ages, and for good reason! They bring a sense of whimsy and nostalgia to the table. With their dramatic red hue and velvety texture, they remind us of celebrations, special occasions, and those cozy moments spent with family and friends. And what’s more fun than turning a classic cake into a skyscraper of brownie goodness?
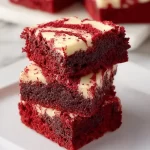
Picture this: a plateful of warm, gooey red velvet brownies, drizzled with creamy white chocolate. They’re as inviting as they are delicious, and trust me, they’ll be the star of your dessert spread. You can whip them up for a birthday party, a cozy gathering, or even just because it’s Tuesday and you deserve a treat! So let’s dive in, roll up our sleeves, and let the magic of baking sweep you away!
Personal Story
Let me take you back to my childhood for a moment. I remember bustling around my mother’s cozy kitchen, the air thick with the sweet aroma of butter and sugar. Birthdays in our home always meant one thing: a towering red velvet cake adorned with fluffy cream cheese frosting. Every layer was a sight to behold, radiant red and smooth as silk!
One year, I decided to be the little chef and try my hand at making those familiar flavors in brownie form, with my mom guiding me every step of the way. We laughed, we made a mess, and most importantly, we created something special together. Those chewy, rich bites of chocolatey goodness instantly became a family favorite, transcending the traditional cake. I remember the joy of cutting into the brownies, revealing that lovely red hue, and we couldn’t wait to dig in.
Every time I bake these Red Velvet Brownies, it’s like travelling back to that sunny kitchen filled with laughter and love—what a warm memory! I always remember that it’s more than just food; it’s about rekindling those connections over something delicious. So, ready to create your own sweet memories? Let’s get started!
Ingredients
Here’s what you’ll need to create your own batch of Red Velvet Brownies:
-
1 cup all-purpose flour
- The foundation of our brownies! All-purpose flour gives the perfect structure while keeping them nice and tender. If you’re looking for a gluten-free version, try using a 1:1 gluten-free flour blend!
-
1 cup sugar
- Sweetness is key, and sugar is what brings it all to life! You can substitute with coconut sugar for a less refined option, but it may slightly alter the color and taste.
-
1/4 cup cocoa powder
- The cocoa powder adds a deep chocolate flavor to the brownies. Opt for unsweetened cocoa for best results! If you’re feeling adventurous, try adding Dutch-processed cocoa for a richer taste.
-
1/2 cup unsalted butter, melted
- Butter keeps your brownies moist and adds a lovely richness. Margarine can be used in a pinch if you need a dairy-free alternative.
-
2 large eggs
- Eggs are the binding agents that give the brownies that delectable fudgy texture. If you want to make them vegan, try using flax egg or unsweetened applesauce as substitutes!
-
1 teaspoon vanilla extract
- Pure vanilla extract enhances the flavor profile. If you don’t have any on hand, vanilla bean paste works wonderfully, too!
-
1 tablespoon red food coloring
- The star of the show! Red food coloring gives those brownies their iconic hue. You can use gel coloring for a more vibrant shade, or beet juice for a natural alternative (but note the flavor may slightly change).
-
1/2 teaspoon baking powder
- A little leavening agent that helps the brownies rise, giving them that perfect texture. If you’re out, you could try baking soda, but reduce the amount slightly!
-
1/4 teaspoon salt
- Just a pinch of salt elevates the flavor, balancing the sweetness perfectly.
-
1/2 cup white chocolate chips (for drizzling)
- These chips add a lovely creamy finish. If you’d prefer dark chocolate, swap in dark chocolate chips for a different flavor twist or omit entirely for a more classic look.
Step-by-Step Instructions
Alright, let’s get cooking! Here’s how to make these delightful Red Velvet Brownies:
Step 1: Preheat and Prep
Preheat your oven to 350°F (175°C). While that’s warming up, grab an 8×8 inch baking pan. Line it with parchment paper, leaving a little overhang on the sides for easy brownie removal. This little hack will save you from a messy situation!
Step 2: Combine the Dry Ingredients
In a medium bowl, whisk together the flour, cocoa powder, baking powder, and salt. Set that mix aside for now. This step allows the dry ingredients to get evenly distributed, which is crucial for the texture of your brownies.
Step 3: Melt the Butter
In a large mixing bowl, melt your butter in the microwave or over a double boiler. If using the microwave, heat it in short bursts to avoid overheating. Once melted, let it cool slightly while you gather your other wet ingredients.
Step 4: Mix it Up
Crack those eggs into the bowl with the melted butter, and whisk to combine! Add the sugar, vanilla extract, and red food coloring, whisking until you have a smooth, vibrant mixture. You should see that beautiful red starting to shine through! The combination of butter and sugar is where all the magic happens. It’s the foundation of your rich texture.
Step 5: Combine Wet and Dry
Gently fold the dry mixture into the wet mixture until just combined. Be careful not to overmix—it’s okay if there are a few streaks of flour remaining. This will keep your brownies nice and fudgy, rather than dry and crumbly.
Step 6: Add in White Chocolate Chips
Using a spatula, fold in those lovely white chocolate chips. They will melt slightly while baking, creating gooey pockets of sweetness throughout!
Step 7: Bake Those Brownies!
Pour the brownie batter into your prepared baking pan and smooth out the top. Pop them in the preheated oven and bake for 20-25 minutes or until a toothpick inserted in the center comes out with a few moist crumbs. You want that perfect balance where they’re set but still ultra fudgy!
Step 8: Cool and Drizzle
Once done, remove the brownies from the oven and let them cool in the pan for at least 10 minutes. Carefully lift the brownies out using the parchment paper and let them cool completely on a wire rack. Now for the fun part! Once cooled, melt some more white chocolate in the microwave (or a double boiler), then drizzle it over the top of the brownies. Get creative with your drizzle—swirl it around for that stunning finish!
Serving Suggestions
Slice these Red Velvet Brownies into squares (or rectangles, if you’re feeling generous) and serve them warm or at room temperature. They’re just delightful on their own, but you can elevate the experience by serving them à la mode with a scoop of vanilla ice cream on the side. Trust me, the warmth of the brownies with the cold ice cream is pure bliss. Or, try sprinkling them with some crushed nuts for added texture—your call!
Recipe Variations
Looking to mix things up? Here are a few fun twists:
- Cream Cheese Swirl: Add dollops of cheesecake batter on top before baking for a luscious cream cheese swirl.
- Nutty Delight: Toss in some chopped walnuts or pecans for a delightful crunch.
- Spicy Twist: Add a pinch of cayenne pepper or cinnamon for a subtle kick.
- Minty Fresh: Substitute half of the vanilla extract with peppermint extract for a seasonal mint treat!
- Dairy-Free: Use coconut oil instead of butter and your favorite dairy-free chocolate chips for a dairy-free version.
Chef’s Notes
Ah, these brownies hold a special place in my heart! The recipe has evolved over the years; I started out using food coloring that would unintentionally turn out pink—hello, experimentation! But that’s what cooking is all about, right? I’ve learned that the best flavors come from taking risks and having a little fun in the kitchen. Trust your instincts, and don’t be afraid to put your own spin on things!
Gather your loved ones, whip up a batch (or maybe two), and enjoy the smiles that follow. You’ll create memories that last a lifetime, and you just might find that this recipe becomes a family favorite, just like it did for me!
FAQs and Troubleshooting
Q: My brownies turned out dry. What went wrong?
A: Overbaking is often the culprit! Keep an eye on them and check for doneness a couple of minutes before the recommended bake time.
Q: Can I use cocoa powder with sugar in it?
A: You can, but it may alter the sweetness of the brownies. I recommend using unsweetened cocoa powder for the best flavor balance.
Q: How do I store leftover brownies?
A: These brownies will keep in an airtight container at room temperature for up to three days, or in the fridge for about a week. You can also freeze them for up to three months—just make sure to wrap them tightly!
Q: What’s the best way to cut brownies?
A: For clean cuts, use a warm knife! Dip your knife in hot water and wipe it dry before slicing—this method makes a world of difference in keeping those edges sharp and tidy.
Nutritional Info
While I believe in enjoying the sweetest treats guilt-free, here’s a general nutritional breakdown per brownie (assuming 16 servings):
- Calories: 180
- Total Fat: 8g
- Saturated Fat: 5g
- Carbohydrates: 25g
- Sugars: 15g
- Protein: 2g
Note: Nutritional values can vary widely based on substitutions and variations.
Conclusion
And there you have it—your very own Red Velvet Brownies! They’re rich, indulgent, and absolutely perfect for any occasion. Who knew something so delicious could bring back such fond memories? I hope this recipe inspires you to get into your kitchen and create flavorful dishes that are always prepared with love. Don’t forget to gather around the table with friends and family and share the joy of these brownies. Happy baking! 🍰
PrintThe Ultimate Red Velvet Brownies
Decadent red velvet brownies drizzled with white chocolate, perfect for sharing or savoring alone!
- Prep Time: 15
- Cook Time: 25
- Total Time: 40
- Yield: 16 servings 1x
- Category: Dessert
- Method: Baking
- Cuisine: American
- Diet: Vegetarian
Ingredients
- 1 cup all-purpose flour
- 1 cup sugar
- 1/4 cup cocoa powder
- 1/2 cup unsalted butter, melted
- 2 large eggs
- 1 teaspoon vanilla extract
- 1 tablespoon red food coloring
- 1/2 teaspoon baking powder
- 1/4 teaspoon salt
- 1/2 cup white chocolate chips (for drizzling)
Instructions
- Preheat your oven to 350°F (175°C). Line an 8×8 inch baking pan with parchment paper.
- Combine the flour, cocoa powder, baking powder, and salt in a medium bowl.
- Melt the butter in a large mixing bowl, then let it cool slightly.
- Mix the eggs, sugar, vanilla extract, and red food coloring into the melted butter until smooth.
- Combine the dry mixture into the wet mixture, folding gently until just mixed.
- Add in the white chocolate chips.
- Bake for 20-25 minutes or until a toothpick comes out with moist crumbs.
- Cool in the pan for 10 minutes, then drizzle melted white chocolate on top once cooled.
Notes
For best results, do not overmix the batter to keep brownies fudgy.
Nutrition
- Serving Size: 1 brownie
- Calories: 180
- Sugar: 15g
- Sodium: 150mg
- Fat: 8g
- Saturated Fat: 5g
- Unsaturated Fat: 3g
- Trans Fat: 0g
- Carbohydrates: 25g
- Fiber: 1g
- Protein: 2g
- Cholesterol: 30mg
Keywords: Red Velvet Brownies, dessert, chocolate, baking, sweets