Platefulkitchen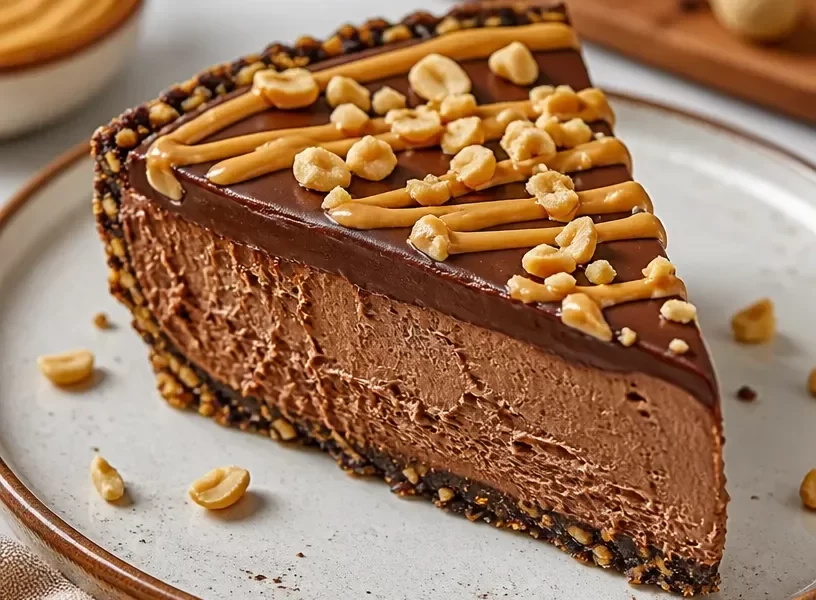
The Creamy Delight of Costco’s Protein Chocolate Peanut Butter Pie
Hello, kitchen enthusiasts! Today, we’re diving into a decadent dessert that’s easy on the waistline but big on flavor: the Protein Chocolate Peanut Butter Pie. If you think that indulging in dessert means sacrificing your health goals, think again! This pie is packed with protein and wholesome ingredients, making it the perfect guilt-free treat for any occasion. So, grab your apron, and let’s turn your kitchen into a haven of deliciousness!
A Slice of Nostalgia
Speaking of indulgent treats, let me share a warm memory from my childhood that inspired this delightful creation. Growing up, my family had a tradition of making pies on lazy Sunday afternoons. We’d pile into the kitchen, a whirlwind of laughter and flour, as we whipped up everything from classic apple pies to rich chocolate silk. One pie, in particular, sticks out in my memory—my aunt’s chocolate peanut butter pie. It was love at first bite, with its rich, creamy filling and an irresistible peanut butter crust.
Fast forward to today, and while the flavor of that special pie still lingers in my mind, I wanted to reimagine it with my healthier twist. My goal was to preserve all that nostalgia while making it a treat I could enjoy without feeling guilty. After some experimenting, this Protein Chocolate Peanut Butter Pie was born! It’s become a go-to dessert for gatherings, and I can’t wait to share it with you.
Ingredients
Here’s what you’ll need to whip up this delightful pie. Don’t worry if you’re missing a couple of things; I’ve included substitution tips!
-
Greek Yogurt or Cottage Cheese:
- Creamy and rich, Greek yogurt is a fantastic base. If you’re not a fan of yogurt, cottage cheese works equally well. Both options are loaded with protein and lend a lovely texture.
-
Chocolate Protein Powder:
- This is the star ingredient. Use your favorite brand to add that chocolatey flavor while boosting the protein content. If you prefer a different flavor, vanilla protein powder can add a sweet notes; just adjust sweetness accordingly.
-
Light Flour Alternative (like almond flour or oat flour):
- If you’re looking for a lower-carb option, almond flour is fantastic. It adds a nutty flavor that complements the pie beautifully. Oat flour can also be a good choice, lending a touch of sweetness.
-
Reduced-Fat Cream Cheese:
- For that luscious creaminess, reduced-fat cream cheese strikes the perfect balance between indulgence and health. You can opt for full-fat if you’re feeling extra decadent!
-
Peanut Butter:
- Natural peanut butter is the key to infusing that rich peanut flavor! For a sweeter touch, you can use honey-roasted peanut butter. If you’re looking for a nut-free alternative, sunbutter works wonderfully too.
-
Flavor-Specific Ingredients (vanilla extract, cocoa powder, and sweetener):
- A splash of pure vanilla extract rounds out the flavors beautifully—don’t skip it! A bit of cocoa powder enhances the chocolate flavor, and your choice of sweetener (honey, maple syrup, or stevia) will depend on your flavor preference.
Step-by-Step Instructions
Ready to create some kitchen magic? Let’s get to it with these straightforward steps.
-
Preheat the Oven:
- Preheat your oven to 350°F (175°C). This is critical for the perfect pie crust.
-
Prepare Your Crust:
- In a mixing bowl, combine 1 cup of your chosen light flour alternative with 1/4 cup of creamy peanut butter and a touch of your sweetener (about 2 tablespoons). Mix until crumbly.
- I like to use my hands for this step—it’s messy but fun and helps you feel the texture. If the mixture seems too dry, add a teaspoon of water or milk until it holds together.
-
Press the Mixture:
- Grease a 9-inch pie dish lightly with cooking spray. Press the crust mixture firmly into the bottom and up the sides, making sure it’s even. It doesn’t have to be perfect; a rustic crust adds charm!
-
Bake the Crust:
- Pop it in the preheated oven for about 10–12 minutes, or until lightly golden. Let it cool a bit while you prepare the filling.
-
Make the Filling:
- In a large mixing bowl, beat together 1 cup of Greek yogurt (or cottage cheese) and 8 oz of reduced-fat cream cheese until it’s smooth. This is where the magic begins—smooth and creamy is what we want!
-
Incorporate Protein Powder:
- Slowly add 1/2 cup of chocolate protein powder, 2 tablespoons of cocoa powder, and a splash of vanilla extract, mixing well until fully combined. You should see a luscious chocolate filling taking shape!
-
Taste and Adjust:
- Here’s my little chef hack: always taste your filling! Add sweetener a little at a time until you reach your desired level of sweetness.
-
Assemble the Pie:
- Pour the filling directly into your cooled crust and use a spatula to smooth the top.
-
Refrigerate:
- Cover the pie and place it in the refrigerator to chill for at least 4 hours. If you can wait overnight, that’s even better; the flavors meld beautifully!
-
Serve and Enjoy:
- When ready to serve, you can garnish the pie with a dollop of Greek yogurt or a sprinkle of crushed nuts on top for an added crunch.
Serving Suggestions
When it comes to plating this beautiful pie, simplicity is key! Slice it into gorgeous wedges and serve on chilled plates. I love adding a scoop of fresh berries on the side—this makes for a lovely pop of color and freshness that balances the creamy richness of the pie. A drizzle of sugar-free chocolate sauce is also a fun garnish if you’re feeling a bit fancy.
Recipe Variations
-
Mint Chocolate Twist:
- Add a few drops of peppermint extract to the filling for a refreshing mint chocolate flavor!
-
Chunky Monkey:
- Mix in sliced bananas or mini chocolate chips into the filling for added texture and sweetness.
-
Berry Blast:
- Incorporate blended fresh raspberries or strawberries directly into the filling for a fruity surprise.
-
Nutty Delight:
- Use almond or cashew butter in place of peanut butter for a nutty flavor twist that’s equally delicious.
-
Dairy-Free Version:
- Swap out dairy products for coconut yogurt and cashew cream cheese for a vegan-friendly option without sacrificing rich flavor.
Chef’s Notes
Every recipe has a story—and this pie has certainly been a journey! I remember the first time I tried to make a healthier version of my aunt’s pie. I was so determined to keep the flavors intact that I ended up with a lumpy mess. After some adjustments and a lot of taste-testing with friends, I finally found the sweet spot. This pie has now become a staple at gatherings, and even those who don’t count macros love it! Trust me; it’s all about trial and error.
FAQs and Troubleshooting
Q: The filling tastes too sweet. What can I do?
A: Try adding a pinch of salt or a tablespoon of unsweetened cocoa powder to balance the sweetness. It can surprisingly tame the sweetness and enhance chocolate flavor.
Q: My crust crumbled when I cut the pie. What went wrong?
A: If the crust is too crumbly, it might need a bit more moisture. Next time, try adding an extra teaspoon of peanut butter or a splash of water to help bind it together better.
Q: Can I make this pie ahead of time?
A: Absolutely! In fact, it tastes even better when made a day ahead. Just keep it covered in the fridge, and it will be waiting for you whenever you’re ready to serve.
Q: How do I store leftovers?
A: Keep the leftover pie covered in the refrigerator. It should last about 4–5 days, but good luck keeping those leftovers around for that long!
Nutritional Info
This pie is not just delicious but a wholesome treat! Each slice is packed with protein, healthy fats, and fewer sugary regrets. While exact nutritional content can vary based on brands and specific ingredients used, you can expect approximately 200 calories, 12g protein, and 10g fat per slice.
And there you have it, my friend! A simple and satisfying Protein Chocolate Peanut Butter Pie that brings joy to your taste buds without the guilt. Cooking isn’t just about nourishing the body; it’s about bringing love and joy to those we share our meals with. So, what are you waiting for? Gather your ingredients and get baking! I can’t wait to hear how your pie turns out. Happy cooking!
PrintProtein Chocolate Peanut Butter Pie
A decadent yet guilt-free dessert packed with protein, perfect for any occasion.
- Prep Time: 15 minutes
- Cook Time: 12 minutes
- Total Time: 240 minutes
- Yield: 8 servings 1x
- Category: Dessert
- Method: Baking
- Cuisine: American
- Diet: High Protein
Ingredients
- 1 cup light flour alternative (almond or oat flour)
- 1/4 cup creamy peanut butter
- 2 tablespoons sweetener (honey, maple syrup, or stevia)
- 1 cup Greek yogurt or cottage cheese
- 8 oz reduced-fat cream cheese
- 1/2 cup chocolate protein powder
- 2 tablespoons cocoa powder
- 1 splash vanilla extract
Instructions
- Preheat your oven to 350°F (175°C).
- Combine the flour alternative, peanut butter, and sweetener in a mixing bowl until crumbly.
- Grease a 9-inch pie dish and press the crust mixture evenly into the bottom and sides.
- Bake for 10–12 minutes or until lightly golden, then let cool.
- In a large bowl, beat the Greek yogurt (or cottage cheese) and cream cheese until smooth.
- Slowly mix in the protein powder, cocoa powder, and vanilla until fully combined.
- Taste the filling and adjust sweetness as desired.
- Pour the filling into the cooled crust and smooth the top.
- Refrigerate the pie for at least 4 hours, or preferably overnight.
- Serve with a dollop of Greek yogurt or crushed nuts for garnish.
Notes
For variations, consider adding mint extract, bananas, or berries to the filling.
Nutrition
- Serving Size: 1 slice
- Calories: 200
- Sugar: 6g
- Sodium: 300mg
- Fat: 10g
- Saturated Fat: 3g
- Unsaturated Fat: 5g
- Trans Fat: 0g
- Carbohydrates: 24g
- Fiber: 3g
- Protein: 12g
- Cholesterol: 30mg
Keywords: dessert, protein pie, chocolate pie, peanut butter pie, healthy dessert